Archive for the 'Home Improvement' Category

China Cabinet Project Complete

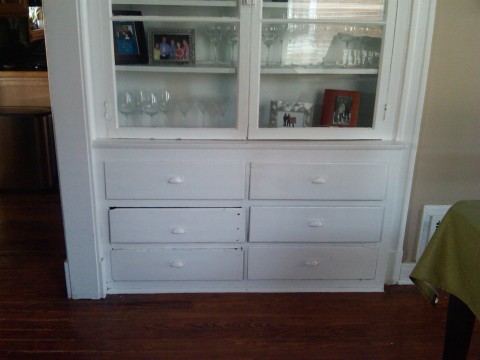
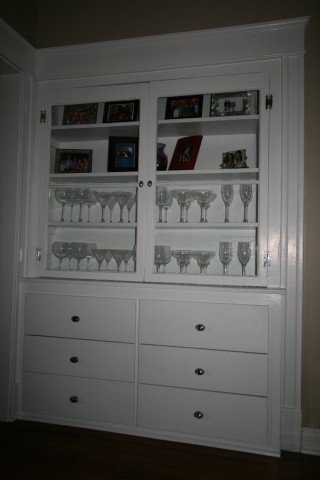
Two weeks ago, I wrote about some improvements we had made to a built-in china cabinet. We finished the work last week, but I kept forgetting to get a picture of the completed project. Well I finally remembered, so here are the before and after photos of the china cabinet. I wish I had a better full size picture of before, but you can still tell how much our work really changed the look.

Before

We removed both of the big glass doors, sanded them, and repainted them. I also spent a good amount of time sanding and painting the inside shelves and trim pieces. We bought matching knobs for the doors, and installed some magnetic cabinet catches to keep the doors closed. I also removed a trim piece of wood from each shelf that must have acted as a plate holder in the past. This allowed us to fully use each shelf and now all the glasses fit much better than they did before.

After

Our First Vegetable Garden

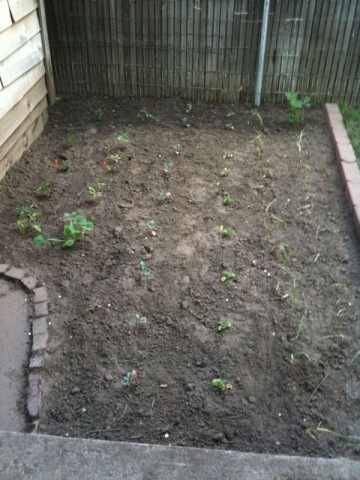
Over the weekend, Kim and I finally planted our very first vegetable garden.  We were out picking up supplies for the built-in china cabinet (update coming soon) and decided to buy a few plants.  As mentioned earlier, I measured the sunlight in our chosen spot, and though it didn’t ever register as full sun, we decided to use the space anyway.  I did cut down a tree branch that hung overhead, so that should help some.  And we figured that Denver averaged so many sunny days, that we should have enough sun.

So, what’s in the picture above?  From left to right, we have a jalapeno plant and four bell pepper plants in the first vertical row.  The next row has a zucchini plant and four tomato plants.  Then we have nine kale plants.  I didn’t necessarily want this many, but that was the only option at the store.  Besides Amstel, our pet rabbit, eats this stuff daily.  Then we have nine broccoli plants.  Again, more than wanted to but limited to what they had.  Amstel will also help eat this.  The last two rows we dedicated to onions.  The plant in the far right corner is a strawberry plant.  I had forgotten about it until the end, so we had to squeeze it in.  We put down a row of landscaping bricks, that you can partially see on the right, to separate the garden from the yard. Proper separation is necessary, according to Couvillion’s Landscapes.  Hopefully the hard work will pay off.

New Cabinet Drawer Photos

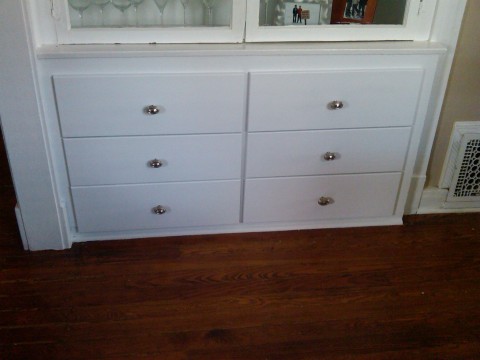
This past Sunday, Kim and I spent the majority of the day painting and finishing the built-in china cabinet drawers that I mentioned last week.  We removed all of the drawers and took them outside to avoid making a huge mess.  While Kim prepped the drawers for painting, I sanded and painted the bottom half of the frame.  Once the drawers were primed and small holes filled, we painted the front and sides of the drawers.  We didn’t want to paint the actual drawer itself, just the part that you can see when they are closed.  Later in the day we also took a trip to Home Depot to get some new knobs.

Before

We still have to refinish the top half of the built-in, but this is definitely a huge improvement already.  We will likely install matching hardware to the glass doors, along with installing some new hinges.  I think we are going to leave the old shelves inside as they are.  Hopefully we find some time this weekend to start and hopefully finish the remaining pieces of the project.  Thanks again for John Monks at Trim Works Carpentry for his excellent work!

After

New Door, New Drawers

We’ve spent a bunch of time on home improvement projects recently, as well as spending some money on it as well.  Kim has wanted a new front door since we moved in, and we finally had that done a couple of weeks ago.  Adoor removed our old door and put in a better fitting solid wood door, along with cleaning up some of our trim, and they will soon be weather-stripping the entire thing.  I found them through servicemagic.com and decided to use them out of the three different offers we received.  I’ve been impressed with the full process thus far and will likely use servicemagic.com again in the future.

Yesterday, Kim had a friend of a friend come in and put in six new drawers in our built-in china cabinet.  The old ones were falling apart, so we had brand new drawers built and placed into new slides.  I still have to paint them and put on new hardware, but so far again it was another great job.  I’m not sure if John has a website or not, but if you need some carpentry type work done in the Denver area I can pass along his contact info.

I’ll be sure to get some new photos of these projects soon.  I wish we had some before photos, though I may be able to dig through some old pictures and find some.  Hopefully I can do some work this weekend and post pictures next week.

Earning My Green Thumb

Today is the 40th Earth Day, if you didn’t already know it.  I’ve recently been thinking about planting a garden for vegetables, and the first thing I’m trying to do is decide where I should put it in the yard.  I think it needs to have at least 6 hours of sun a day and daily watering.  The watering part is easy, as most of the yard gets watered a few times a week, and I can supplement additional watering as needed.  The difficult part is the sun.  I have an ideal spot on the southern edge of our backyard that I’d really love to use, but I’m not sure it gets enough sun due to a fence and shed.  So I just ordered this sunlight calculator to help me find out.  It should also help me in judging what plants to put in other places of the yard.  We already planted two new plants over the weekend, and I have plans to plant even more soon.

Back To The Basement

Last night I spent some time down in the basement, working on my finishing project, for the first time since April. I guess the warmer months didn’t provide me with much opportunity to stay inside and work. Now that the sun is setting before I’m even off work, I hope I’ll be able to dedicate some time to the project once again.  Anyway, last night I finished patching a ten square foot section of the floor that was not even close to level with the rest of the basement. Nearly a year ago, I filled in most of it, and I finally finished it off with some resurfacing mix that is much smoother. I forgot to get a picture, but may post one in the future.  I still need to decide what we want to do to finish the flooring, but that may be able to wait while the walls are constructed. Hopefully that will start soon. Nearly a year after I started working on the project, I’ve yet to get much accomplished, but I’m hoping that will all change this winter.

Spring Has Sprung

Spring is in the air, and I’m loving every minute of it. In addition to all of the running outside, long bike rides, and other outdoor fitness activities, I really enjoy getting in the yard and doing some landscaping. On Sunday, I added some new shrubs to our back fence area, a spot where grass refuses to grow, which I’m very happy about. I also mowed the lawn for the first time, put down some fertilizer, and tested out the sprinkler system. I found an outside leak that I hope to fix this weekend, and then we’ll be fully ready for summer. We even kicked on the swamp cooler fan last night for the first time. It was over 80 degrees upstairs at 10 o’clock, so we had to get some cooler air inside for bed time.

I’ve also been trying to take myself off of my daily dose of Claritin-D. I was hoping that maybe I’m outgrowing my allergies, but have resulted to taking a couple doses of Claritin without the decongestant. I’m also looking at more natural ways to reduce the effects from season allergies. I’ve been reading up on different herbs but haven’t taken that plunge. I feel alright most of the time, but recently I’ve been struggling with a cold that I just can’t kick. Perhaps some racquetball tonight will knock it out of my system, the run yesterday didn’t help.

Nearly Construction Time

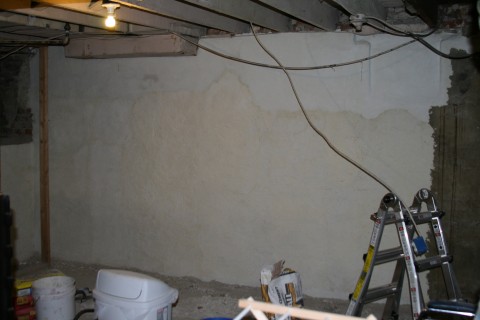
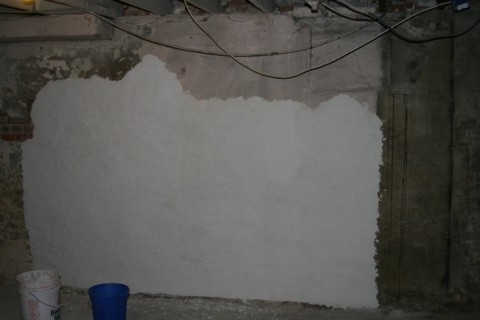
I have finally finished sealing the basement walls, or at least the largest section of it before some construction can begin. I originally wanted to finish this before Jan 1, but I was really underestimating the amount of work to be done. Next, I need to finish leveling the large section of floor that was not even close to being flush. This won’t level out the entire floor, but it’s a good start, and then I can decide what I want to do from there for the finished surface.

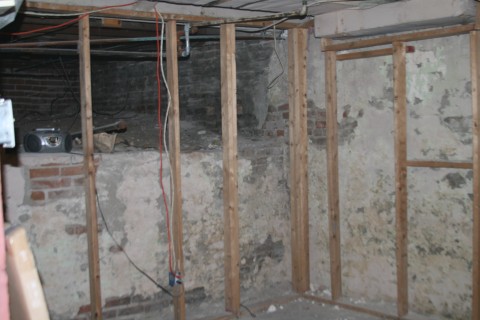
Here’s a shot of the walls before I even started applying anything:

img_3419

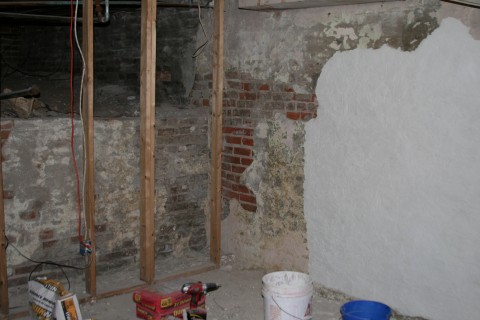
Halfway through:

img_3502

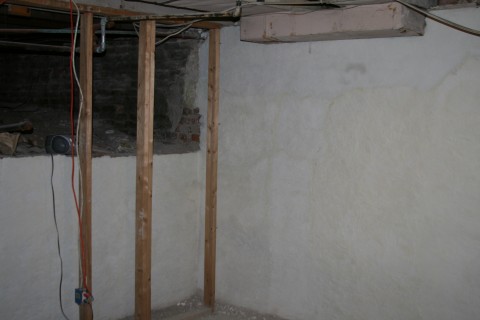
Finished:

img_3823

Here is another look at the largest exterior wall with my finished work. You can notice some color difference between where I started and the last section I did on the upper third of the wall:

img_3824

Here is what it looked like halfway through, back in December:

img_3501

Home Security For City Living

I installed a home security system into the house last night from SimpliSafe. We had always tossed around the idea of having a system installed, but were put off from the high costs associated with companies like ADT or Brinks. When I first read about SimpliSafe, I was immediately impressed not only with the low cost, but also with the ease of customizing/expanding the system and the simple look of the system. The setup couldn’t have been easier with the great setup guide on the computer and the wonderfully wireless components already equipped with sticky tape. And any time I’ve run into a question or issue, their customer service has been top notch responding almost immediately and doing everything possible to please. I am highly impressed with everything so far and I would definitely recommend this system.

Destroying Less Than Before

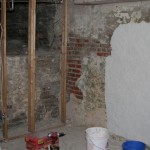
Less than one month after I started putting some serious effort into the basement, I’d like to provide a quick update and some photos. I removed most of the old framing, except for a section that seems to be solidly anchored, which I’m now considering keeping. I then started leveling the floor and sealing up the foundation walls. If you view each of the photos below, I’ve provided a link to a similar before shot so you can see how I’m progressing. There is still lots to be done, but I’m hoping the sealing will be done by the end of the year, then it’s time to actually start building things.