The third floor of our house has always been setup as a master suite. It is the only bedroom in our house with its own bathroom. When our second kid came along we decided to move our bedroom furniture from the second floor up to the third and let the new baby have our old room. In order to do this, we realized that we needed a much larger closet than what was already available on the third floor.
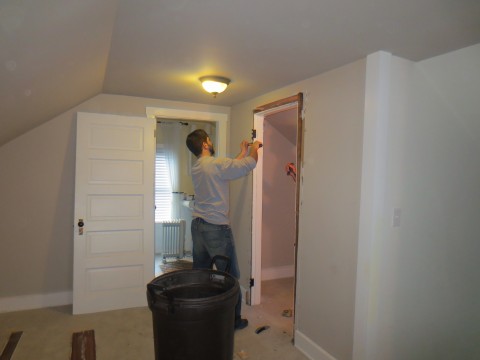
Removing Trim
I came up with a plan to tear down the old closet wall, and build a new wall perpendicular to it. This would easily double if not triple the amount of closet space available to us. Since the bathroom is at the back of the house, the new closet would be a walk-through.
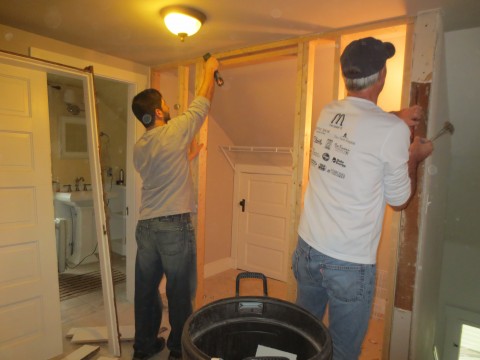
Demolition Time
My dad came over before the baby was born to help with the demolition and construction of the new wall.
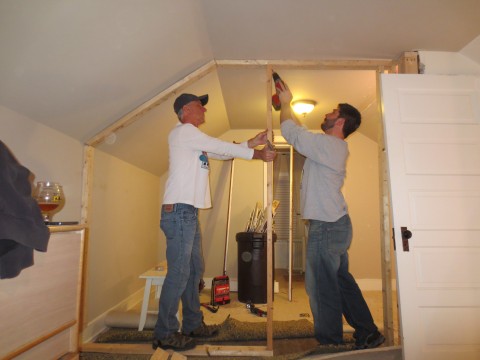
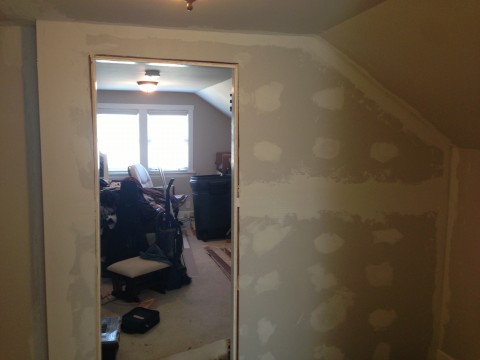
The New Wall
The demolition is definitely the most fun part of the project, but it was nice to see progress once the construction started.
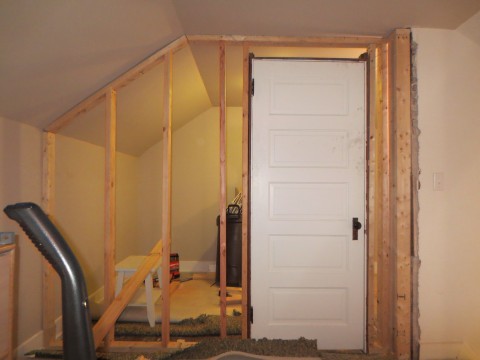
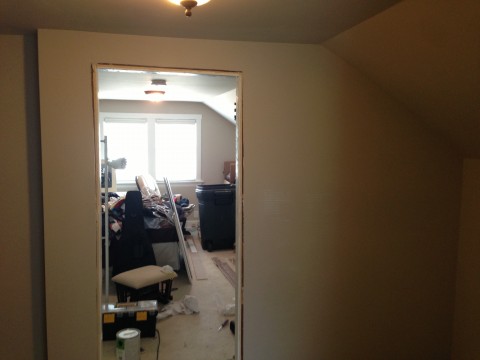
Wall Complete
Kim’s uncle Joe helped me to hang the drywall and get it taped and mudded.
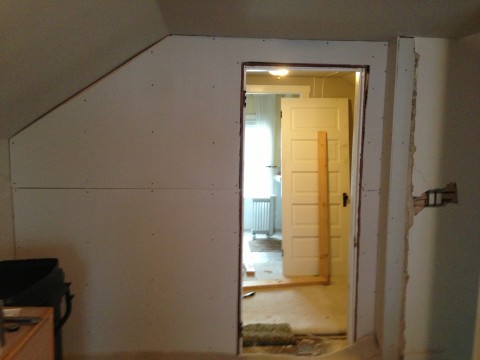
Drywall Hung
He also added a switch so that the two lights in the old room could be turned on independently of the other. One of the lights would now be inside the walk-through closet.
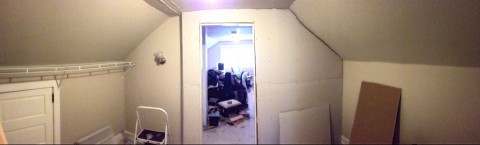
Interior Of New Closet
Mud Applied
After three coats of mud it was time for some paint, also getting excellent interior house painting tips can be used in such situations. . I decided to keep it simple and paint the inside of the closet the same color as the bedroom. This made it easy on me since a couple of the old walls were already painted the correct color, and most of the ceiling too.
New Paint
After tearing up the carpet to build the new wall across the room, it was pretty obvious to me that the old carpet would not be useful anymore. It was at this time that I decided to put down some laminate flooring.

New Floors
This was the click together kind, which I found very easy to work with. So far it seems a lot more durable than the stick together kind. The only disadvantage is the installation of the stick together only needed a razor blade, while the thicker click together required a saw.
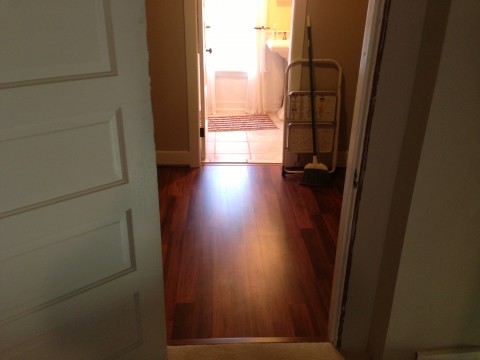
Floors Complete
Once the walls and floors were complete I started working on a design for the shelving. I decided to use a combination of Rubbermaid’s HomeFree series and their FastTrack along with a lot of the FreeSlide wire shelving for our hanging clothes.
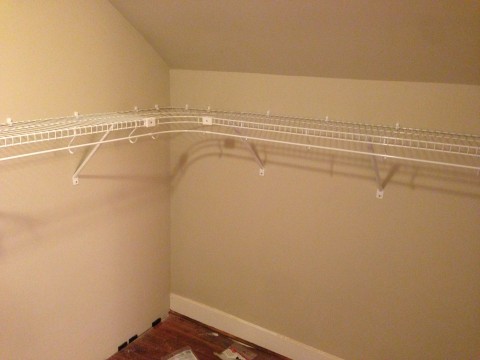
New Shelving
Once the shelving was all installed we very quickly filled it up completely.
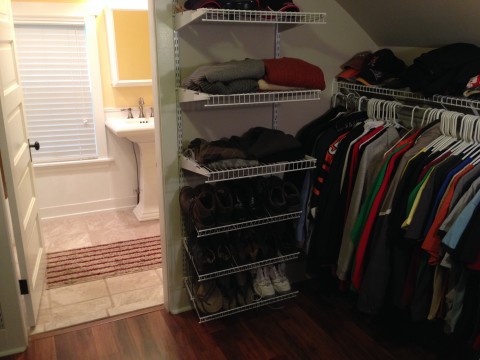
More Shelving
I even had one of my shelves fall off the wall, but have since found some studs to screw the supports back and the shelf is operational once more.
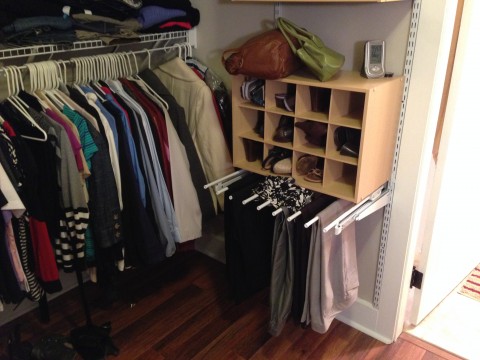
Even More Shelving
Somewhere along the way we also had the four windows on the third floor replaced. These were the last four single pane windows left on the house.
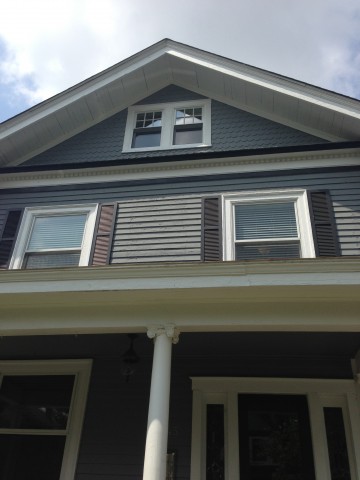
New Windows Exterior
The old windows either didn’t open or wouldn’t stay open. Plus we didn’t have any screens for them. The new windows are wonderfully easy to operate and help us cool and heat the space.
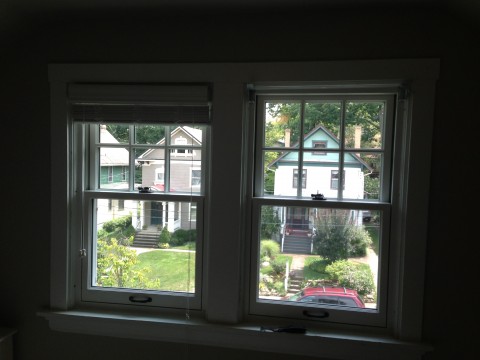
New Windows Interior
The only thing we are considering now is installing a mini-split system for air conditioning and heat. There are no vents for the system that is already installed on the other floors. I think that will definitely come before next summer. We are really loving all the extra space!
 edpaffjr.com